How to Grow Mushrooms at Home :
A Step-by-Step Guide
Growing mushrooms at home can be a rewarding and fascinating hobby. Not only can you enjoy the fresh taste of homegrown mushrooms, but you can also learn about the fascinating biology of fungi. This guide will walk you through the process of growing mushrooms at home, from selecting the right type of mushroom to harvesting your crop. Let’s dive in!
Understanding Mushrooms
Mushrooms are the fruiting bodies of fungi, and they thrive in environments rich in organic matter. Unlike plants, mushrooms do not require sunlight to grow; instead, they absorb nutrients from decomposing material. This makes them ideal candidates for home cultivation, as they can be grown indoors or outdoors.
Choosing the Right Mushroom Type
Before you start, you need to decide which type of mushroom you want to grow. Here are some popular options for beginners:
- Oyster Mushrooms: Easy to grow and fast to harvest, they come in various colors and have a mild flavor.
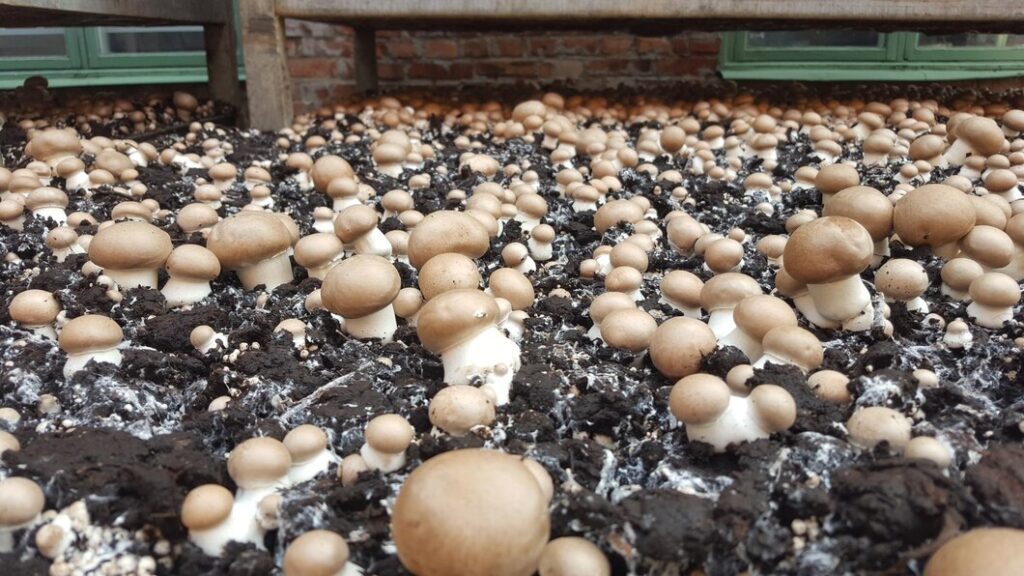
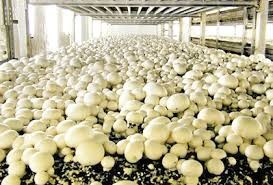
- Button Mushrooms: Commonly found in supermarkets, they require a bit more attention but are very rewarding.
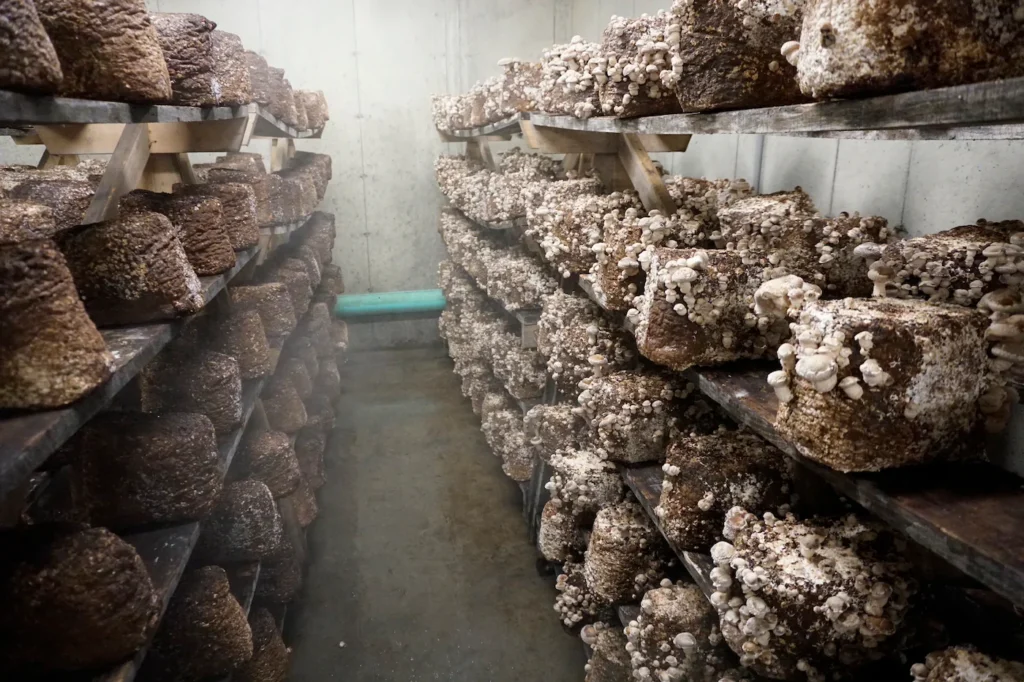
- Shiitake Mushrooms: Known for their rich flavor, they require logs or sawdust for cultivation.
- Lion’s Mane: Recognizable by its unique appearance, it has potential cognitive benefits.
Step 1: Gather Your Materials
To start growing mushrooms, you’ll need the following materials:
Basic Supplies
- Mushroom Spawn: This is the mycelium (the vegetative part of the fungus) from which mushrooms will grow. You can purchase it from specialty gardening stores or online.
- Growing Medium: Depending on the mushroom type, this could be straw, wood chips, coffee grounds, or a pre-packaged mushroom growing kit.
- Containers: Choose containers based on the growing method. Plastic bags, trays, or jars work well.
- Moisture: A spray bottle or humidifier can help maintain the right humidity levels.
Optional Supplies
- pH Test Kit: To check the acidity of your substrate.
- Pressure Cooker: For sterilizing your growing medium (especially important for certain mushrooms).
- Thermometer: To monitor temperature during the growing process.
Step 2: Prepare Your Growing Medium
The growing medium must be prepared correctly to support mushroom growth. The process varies depending on the type of mushroom you are cultivating.
For Oyster Mushrooms
- Select Substrate: Straw is a common choice. Alternatively, you can use coffee grounds or sawdust.
- Chop and Soak: Chop the straw into smaller pieces (about 2–4 inches long) and soak it in water for several hours to hydrate.
- Pasteurize: Heat the soaked straw in boiling water for about 30 minutes to kill off any competing microorganisms. Drain and let it cool.
For Shiitake Mushrooms
- Select Logs: Fresh hardwood logs (like oak or maple) work best. Cut logs about 3–4 feet long and 4–6 inches in diameter.
- Inoculate: Drill holes in the logs and insert mushroom spawn. Seal the holes with wax to prevent contamination.
Step 3: Inoculation
Inoculation is the process of introducing the mushroom spawn into the prepared substrate.
For Bag or Tray Growing (e.g., Oyster Mushrooms)
- Mix Spawn and Substrate: In a clean environment, mix the mushroom spawn with the cooled, pasteurized substrate in a sterile container.
- Fill Containers: Pack the mixture tightly into your chosen containers, leaving some space for air circulation.
- Seal and Label: Seal the containers with breathable material (like a filter patch bag) and label them with the date and mushroom type.
For Log Growing (e.g., Shiitake)
- Insert Spawn: Place the spawn in the drilled holes and seal with wax.
- Store Logs: Stack the logs in a shaded, humid area, ideally in a garden or shed.
Step 4: Incubation
Once inoculated, your mushrooms need time to colonize the substrate.
Ideal Conditions
- Temperature: Keep the temperature between 65°F and 75°F (18°C to 24°C) for most varieties.
- Humidity: Maintain high humidity (around 85–95%) during this stage. You can cover the containers with plastic to retain moisture.
Duration
- Timeframe: Incubation typically takes 1 to 4 weeks, depending on the mushroom type. You’ll know it’s ready when the substrate is fully colonized by white mycelium.
Step 5: Fruiting Conditions
After the incubation period, it’s time to initiate fruiting conditions.
Create the Right Environment
- Temperature Change: Lower the temperature slightly (by about 10°F) to signal the mushrooms to fruit.
- Increase Light: Expose the growing area to indirect light for a few hours each day. Mushrooms don’t need direct sunlight, but they do need some light to develop properly.
- Humidity Control: Increase humidity levels if necessary. Mist the substrate regularly, or use a humidifier to keep moisture levels high.
For Log-Grown Mushrooms
- Place the logs in a shady spot outdoors or in a cool, humid environment. They may take a bit longer to fruit but can yield multiple flushes.
Step 6: Harvesting Your Mushrooms
Once your mushrooms begin to fruit, they will grow rapidly. Here’s how to harvest them:
Signs of Readiness
- Oyster Mushrooms: Harvest when the caps are fully developed but before they start to curl upward.
- Shiitake Mushrooms: Harvest when the caps are firm and fully opened but still slightly curled down.
- Lion’s Mane: Pick when the spines are long and before they start to brown.
Harvesting Technique
- Use a Sharp Knife: Cut the mushrooms at the base of the stem. Avoid pulling them out, as this can disturb the mycelium and affect future growth.
- Leave Some Mycelium: Always leave some of the mycelium intact to ensure continued growth for future flushes.
Step 7: Storing Your Mushrooms
After harvesting, proper storage is essential to maintain freshness.
Short-Term Storage
- Refrigeration: Store fresh mushrooms in a paper bag in the refrigerator. Avoid plastic bags, as they trap moisture and can cause spoilage.
- Use Quickly: Fresh mushrooms are best consumed within a week.
Long-Term Storage
- Drying: You can dry mushrooms using a food dehydrator or by placing them in a warm, dry area. Once dried, store them in airtight containers.
- Freezing: Clean and blanch mushrooms before freezing them in airtight bags for long-term storage.
Step 8: Troubleshooting Common Issues
While growing mushrooms is generally straightforward, you may encounter some challenges. Here are common issues and solutions:
1. Contamination
Symptoms: Unpleasant odors, green or black mold.
Solution: Ensure a clean environment during inoculation, use sterilized tools, and avoid overcrowding. If contamination occurs, remove the affected substrate immediately to prevent it from spreading.
2. Poor Growth
Symptoms: Slow growth or lack of fruiting.
Solution: Check environmental conditions. Ensure the right temperature, humidity, and light levels are maintained. Adjust conditions as needed.
3. Pests
Symptoms: Insects or pests on your substrate.
Solution: Keep the growing area clean. Use organic pest control methods if necessary, and inspect your substrate regularly for signs of infestation.
Conclusion
Growing mushrooms at home is a fulfilling and educational endeavor that can yield delicious and nutritious results. By following the steps outlined in this guide, you can successfully cultivate a variety of mushrooms, whether indoors or outdoors. Remember to remain patient and attentive to the needs of your mushrooms throughout the process. With practice, you’ll become adept at mushroom cultivation, and you can enjoy the fruits of your labor in your favorite dishes. Happy growing!